


7 Steps to Plan Cabinet Storage Around Your Appliances

Quick Summary
Plan the appliances first, then build cabinet storage around them. Measure each appliance's size, clearances, and door swing, map outlets and utility lines, and assign cabinets by how often each item is used. Fixed appliances and utilities are costly to move once cabinets are installed.
- Measure each appliance's opening, clearances, and full door swing before ordering cabinets
- Record measurements in inches to the nearest 1/8 inch, noting manufacturer minimums
- Map outlets, dedicated circuits, water lines, and gas lines before locking the cabinet layout
- Place daily-use items between knee and shoulder height and heavy cookware in deep drawers
- Decide which small appliances stay on the counter and which go in an appliance garage or cabinet
Table of Contents
- Why Appliance Placement Should Come Before Cabinet Storage
- Step 1: Inventory Your Kitchen Storage Needs
- Step 2: Measure Major Appliances, Clearances and Door Swings
- Step 3: Coordinate Electrical, Plumbing and Utility Locations
- Step 4: Decide Which Small Appliances Stay on the Counter and Which Go Inside
- Step 5: Assign Cabinets by Frequency of Use and Reach
- Step 6: Organize Cookware, Dishes and Cleaning Supplies for Small Kitchens
- Step 7: Build Your Worksheet and Plan the Next Step
- Frequently Asked Questions
Why Appliance Placement Should Come Before Cabinet Storage
Last Updated: November 15, 2026
Most kitchen remodels go wrong at the same point: someone picks cabinet storage first and fits the appliances in afterward.
Here is the practical reason. Appliances have fixed sizes, required clearances, and utility connections. Cabinets are flexible until you install them. For the broader planning context behind this approach, see our complete kitchen and cabinet planning guide.
In this guide, you will work through seven steps, from inventorying your storage needs to organizing the small items that fill the drawers. Each step builds on the last, and a planning worksheet at the end pulls everything together.
- Appliances have fixed sizes and clearances that cabinets must respect
- Utility locations are expensive to move after cabinets are installed
- Planning appliances first prevents costly mismatches and rework
Step 1: Inventory Your Kitchen Storage Needs
Before you measure anything, list what you actually store. Count the dishes, pots, pans, food, and cleaning supplies you use every week. This list tells you how much cabinet space you need, which matters more than cabinet style.
Sort items into three groups:
- Daily-use items: coffee mugs, plates, cooking oil, and the everyday knife
- Regular-use items: stand mixer, large pots, baking sheets
- Occasional-use items: turkey roasting pan, fondue set, holiday platters
Daily-use items belong at eye or hand level. Occasional-use items can go high or in the back of a deep cabinet. Knowing which group each item falls into makes later decisions much easier.
Step 2: Measure Major Appliances, Clearances and Door Swings
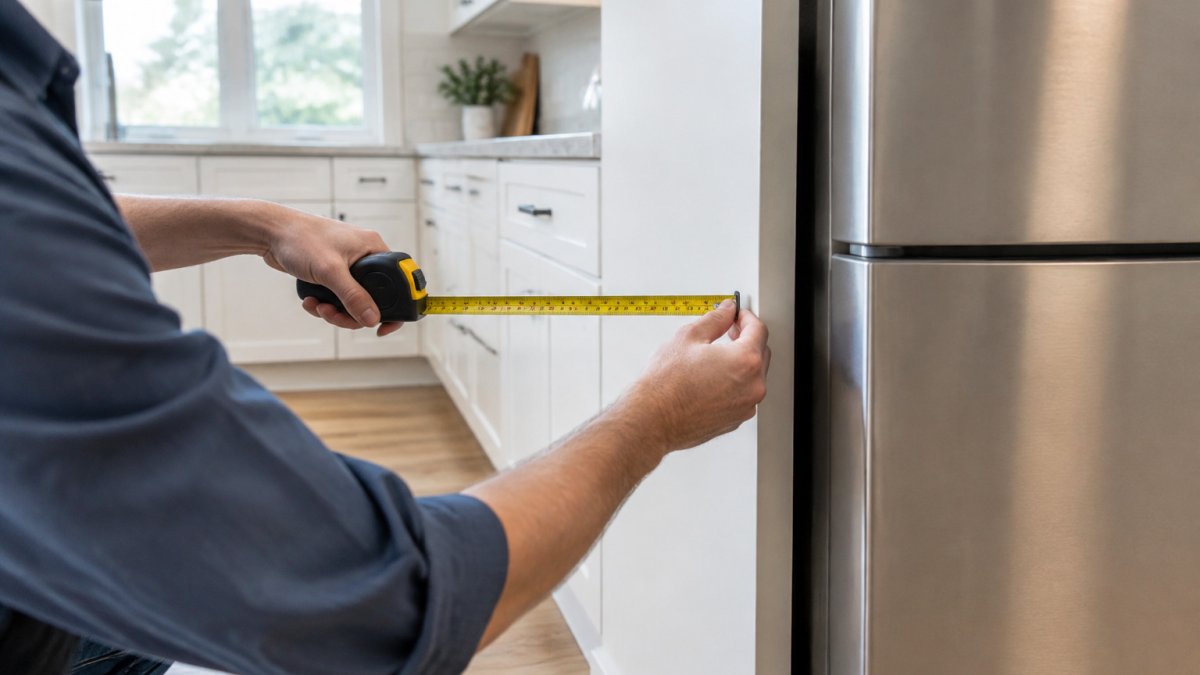
This is the step most homeowners rush, and it is the one that decides whether your cabinet plan survives installation day. Measure each major appliance three ways: the appliance itself, the finished opening it will sit in, and the full path its doors and drawers travel. Record every number on your worksheet in inches, to the nearest 1/8 inch, and note which measurements are manufacturer minimums versus your own preference.
A Measurement Checklist for Each Appliance
Work through this list appliance by appliance. Write the numbers down rather than trusting memory.
- Refrigerator: Record cabinet width, height, and depth of the refrigerator, plus the width, height, and depth of the opening. Note the hinge side and whether the doors are reversible. Measure the door swing arc and add the depth of the doors when open, a standard-depth refrigerator with doors open can project well past the cabinet face, and a counter-depth model still needs room for the doors to clear an island or wall.
- Range: Record the cutout width and depth the manufacturer specifies, not just the appliance width. Note whether the range is slide-in or freestanding, because slide-in models overlap the countertop edge and change how adjacent cabinets are finished. Measure the height from floor to cooktop surface so upper cabinets and the hood align.
- Dishwasher: Record the opening width, height, and depth, and confirm the door's full open position. Measure from the front of the dishwasher to the nearest cabinet, island, or wall in the door's swing path. A dishwasher door that opens into a drawer pull or a pantry pull-out is a common and expensive mistake.
Ventilation and Installation Clearances to Check
Appliances need air to run efficiently and safely. Refrigerators and ranges generate heat, and cramped installations can shorten their lifespan and, in the case of ranges, create a fire risk. Before you finalize cabinet positions, look up each appliance's installation guide and note its required side, rear, and top clearances. These are minimums, not suggestions, building cabinets tighter than the manual allows can void a warranty.
- Refrigerator: Note the required side gaps, rear clearance, and top clearance. Some models need several inches at the back for the condenser; others are designed for near-flush installation. Confirm which type you are buying before you set the cabinet depth.
- Range: Note the minimum distance from the cooktop to combustible surfaces above and beside it, including upper cabinets and any side panel. Check the manual for the required clearance to the rear wall and to adjacent cabinets.
- Range hood: Confirm the mounting height range above the cooktop and the duct size the hood requires. Upper cabinets placed too low can conflict with the hood and reduce its capture efficiency.
Door Swing and Drawer Pull Geometry
Clearances are not only about the appliance. Map the full travel of every door and drawer that shares space with an appliance.
- Mark the refrigerator door swing on the floor plan, including the arc when the door is open 90 degrees and beyond.
- Mark the dishwasher door's drop-down path and confirm no drawer, pull-out, or cabinet door opens into it.
- Mark the range oven door's drop-down path and confirm it clears the island or opposite counter.
Watch out: a refrigerator door that opens against a wall or tall cabinet can be limited to less than 90 degrees, which makes removing crisper drawers and cleaning the interior difficult, measure the swing, not just the opening.
The table below summarises the key measurement and clearance checks for each major appliance.
| Appliance | What to record | Key check |
|---|---|---|
| Refrigerator | Width, height, depth and opening size | Door swing clears a 90-degree open position |
| Range | Manufacturer cutout width and depth | Combustible clearances to cabinets |
| Dishwasher | Opening width, height and depth | Door opens clear of drawers and pull-outs |
| Wall oven and microwave | Cutout size and bottom height from floor | Filler or trim kit closes the gap |
| Range hood | Mounting height above cooktop | Duct size and minimum mounting height |
| Measurements | Recorded in inches to the nearest 1/8 inch | Manufacturer minimums versus preference noted |
Step 3: Coordinate Electrical, Plumbing and Utility Locations
Utilities are the least flexible part of a kitchen plan. Cabinets are easier to reconfigure on paper than utilities are to move after the walls are closed. Map every connection on your floor plan before you lock in cabinet layout, and note which ones you are willing to move and which you are designing around.
Outlets and Circuits
Outlets determine where small appliances can live and where appliance garages make sense. Walk the plan and mark every receptacle, then check it against your appliance list.
- Countertop small appliances: Confirm there is a receptacle near each spot where a coffee maker, toaster, or air fryer will sit. A common pattern is to place receptacles so cords do not cross a cooking zone or a sink.
- Microwave: A built-in or over-the-range microwave needs a dedicated circuit in most installations. Confirm the outlet location matches the cabinet you plan to install, and check whether the cord reaches from the outlet to the unit inside the cabinet. For placement options, see microwave cabinet layout options.
- Dishwasher: Confirm a dedicated circuit and an outlet or direct connection accessible after the dishwasher is installed. The connection point must be reachable for service without removing cabinets.
Watch out: an outlet placed behind a refrigerator or range that is not reachable after installation forces you to pull the appliance out for service, confirm the connection point is accessible.
Water Supply and Drain
The sink and dishwasher must line up with plumbing, and the cabinet layout has to leave room for the supply lines and drain.
- Sink: Confirm the sink cabinet width accommodates the sink basin plus the plumbing on both sides. A large single-bowl sink or a farmhouse sink changes the cabinet dimensions and the drain position.
- Dishwasher: Confirm the water supply and drain connection are within reach of the dishwasher's hose length, and that the connection point is accessible from an adjacent cabinet or from the front.
- Pot filler or filtered water: If you plan a pot filler or an under-sink filter, confirm the supply line route before cabinets are ordered.
Gas Lines and Venting
- Gas range: A gas range needs a connection in a fixed spot. Confirm the line location relative to the range cutout and whether the shutoff valve is accessible. If you are switching from electric to gas, confirm the line can be run to the new location before you commit to the layout.
- Range hood: Confirm the duct path to the outside and the duct size the hood requires. A hood that must vent through a cabinet run needs the duct planned into the cabinet layout, not added after.
- Downdraft venting: If you are considering a downdraft range or cooktop, confirm the duct route below the floor or through the cabinet base.
Service Access
Every appliance that can fail needs a way to be serviced without demolishing the kitchen. Leave access panels or removable cabinet backs where the installation guide requires them, and confirm that shutoff valves for water and gas are reachable.
Once the utility map is complete, compare it against your appliance placement plan. Any conflict between a connection and a cabinet is cheaper to resolve on paper now than after the cabinets are installed.
Step 4: Decide Which Small Appliances Stay on the Counter and Which Go Inside
Small appliances create most of the clutter in a kitchen. Ask yourself how often you use each one. A coffee maker used every morning may stay on the counter. A stand mixer used twice a month may work better in a base cabinet.
Common small appliances and where they often go:
- Coffee maker and toaster: counter or appliance garage
- Air fryer and food processor: base cabinet or pantry pull-out
- Stand mixer and bread maker: lower cabinet with a pull-out shelf
An appliance garage with a roll-up door keeps counter appliances hidden but within reach. Make sure the cabinet is deep enough and has an outlet inside.
Step 5: Assign Cabinets by Frequency of Use and Reach
Now place your items. Use your Step 1 list and match each group to a cabinet zone:
- Between knee and shoulder height: daily-use items such as plates, glasses, and spices
- Deep base drawers: heavy pots, pans, and bulky small appliances
- Upper cabinets: occasional-use items and lightweight bakeware
Reach matters, especially for older adults and anyone who lifts heavy items often. For compact options, see galley kitchen cabinet layout ideas. Keep heavy cookware low and in drawers rather than on high shelves.
Step 6: Organize Cookware, Dishes and Cleaning Supplies for Small Kitchens
Small kitchens need every inch to work. Use drawer inserts for utensils, stackable organizers for dishes, and vertical dividers for baking sheets and cutting boards.
- Store pots and pans in deep drawers, nested and separated by dividers
- Keep dishes in cabinets near the dishwasher to shorten unloading trips
- Place cleaning supplies under the sink or in a narrow pull-out beside it
For a compact kitchen, a food storage container organizer keeps lids and containers from spilling out whenever you open the cabinet.
Step 7: Build Your Worksheet and Plan the Next Step
Use this worksheet to record your decisions:
- Refrigerator: width, height, depth, opening size, clearances noted
- Range and hood: width, required clearance, vent path confirmed
- Dishwasher: door swing path, outlet and water line located
Once your worksheet is complete, you have the information needed to choose cabinets that fit.
For more planning context, see our complete kitchen and cabinet planning guide. If you are working in a narrow room, our galley kitchen cabinet layout ideas show how to fit storage into tight spaces.
Ready to put your plan into action? Plan Your Project with Frugal Cabinets Online, where you can find premium RTA cabinets, free design services, and fully refundable sample doors to test your choices before you commit.
Frequently Asked Questions
What are some good ideas for storing kitchen appliances in a cabinet?
Store appliances you use daily, such as a coffee maker or toaster, in base cabinets with pull-out shelves so you can lift them out without reaching into a deep space. Use cabinets near the outlets you already have and check that the appliance fits the opening with its cord and handle included. Larger, occasional-use appliances like stand mixers can go in a lower deep drawer or a cabinet with a sliding tray. Keep frequently used items at waist-to-shoulder height and reserve high or corner cabinets for items you use less often.
Should frequently used appliances be stored near the counter?
Yes. Place daily-use appliances in a cabinet next to the work surface where you prepare food, so you can grab and return them without crossing the kitchen. A base cabinet with a pull-out shelf beside the counter works well for a coffee maker or toaster. Keep heavy appliances low to avoid lifting them overhead, and make sure the cabinet has enough clearance for the appliance's height and any ventilation it needs.
How much cabinet space should you allow for kitchen appliances?
Measure each appliance's width, depth and height, then add clearance for the door swing, cord and ventilation. Built-in refrigerators, ranges and dishwashers need their installation clearances as listed by the manufacturer, so check the spec sheet before finalizing the layout. For small appliances, allow a few extra inches of height so you can lift them in and out easily. The Yarmouth Slab Wall Refrigerator Cabinets 2 Doors 24" Deep with Butt Doors & Pullout Shelf at $961.00 offers wall storage with a pullout shelf.
How do you organize kitchen cabinets in a small space?
Start by sorting items into daily, weekly and occasional-use groups, then place the daily group in the most accessible cabinets. The Base Cabinet Pullout with Utensil Bins at $442.25 is a pull-out organizer for base cabinets. Keep cookware in the drawer nearest the range and dishes near the dishwasher. Remove items you no longer use before planning, since a smaller set of belongings makes a tight kitchen far easier to lay out.


