


Kitchen and Cabinet Planning: A Complete Guide

Table of Contents
- Understanding Kitchen and Cabinet Fundamentals
- Types of Kitchen Cabinets: Which Option Fits Your Needs
- Kitchen Cabinet Layout: Designing Your Space
- Kitchen Cabinet Organization Ideas for Maximum Storage
- Ready-to-Assemble Kitchen Cabinets: Benefits and Assembly
- Cabinet Materials, Finishes, and Durability
- Budgeting Your Kitchen and Cabinet Project
- Installation: DIY or Professional Help
- Frequently Asked Questions
Last Updated: October 12, 2026
Understanding Kitchen and Cabinet Fundamentals
A kitchen and cabinet system combines storage, style, and workflow into one integrated design.
The right setup saves time daily; poor planning leads to wasted space, cluttered counters, and constant reorganization.
At Frugal Cabinets Online, we help homeowners and contractors plan kitchen and cabinet projects that deliver real value without breaking the budget.
Intentional design separates a well-planned kitchen and cabinet layout from a frustrating one: know what cabinet types exist, how they fit your space, and what materials last.
Types of Kitchen Cabinets: Which Option Fits Your Needs
Kitchen and cabinet options fall into distinct categories, each fitting different layouts and storage needs.
Base Cabinets and Wall Cabinets
Base cabinets sit on the floor, support countertops, and are typically 34-36 inches tall in standard widths like 12, 15, 18, 24, 30, and 36 inches. They handle heavy items like pots, pans, and small appliances.
Wall cabinets mount above counters, usually 12-15 inches deep and 12-42 inches tall, storing dishes, glasses, and everyday items.
Most kitchens use both types to maximize usable space from floor to ceiling.
Popular base cabinet options include:
- Standard cabinets with one door and one drawer
- Sink base cabinets with plumbing cutouts
- Corner cabinets that maximize unused corner space
- Drawer-heavy cabinets for better accessibility
Wall cabinets offer similar variety: glass-front doors for display, solid doors for concealment, or open shelving (which requires more maintenance).
Specialty Cabinets for Storage and Function
Specialty kitchen and cabinet units solve specific problems. A tall pantry cabinet provides floor-to-ceiling storage for bulk items and small appliances, typically 84 inches tall in 18, 24, or 30-inch widths.
Trash pullout cabinets hide garbage and recycling bins inside a standard base cabinet. The Dover Base Cabinets with Trash Pullout features a 35-quart bin with soft-close operation, giving you a professional kitchen and cabinet experience at an affordable price.
Sink base cabinets have plumbing cutouts and support your sink and faucet. The Dover Sink Base Cabinet includes tilt-out storage for sponges and cleaning supplies, maximizing every inch of space.

Other specialty options include:
- Spice racks and narrow vertical storage
- Blind corner cabinets with rotating shelves
- Appliance garages that hide small kitchen tools
- Wine racks and beverage coolers
- Drawer dividers and pull-out organizers
Identify which storage problems exist in your kitchen and cabinet layout before ordering.
Kitchen Cabinet Layout: Designing Your Space
A functional kitchen and cabinet layout follows workflow patterns. Most kitchens have a triangle formed by the sink, stove, and refrigerator, and cabinets should support movement between these points.
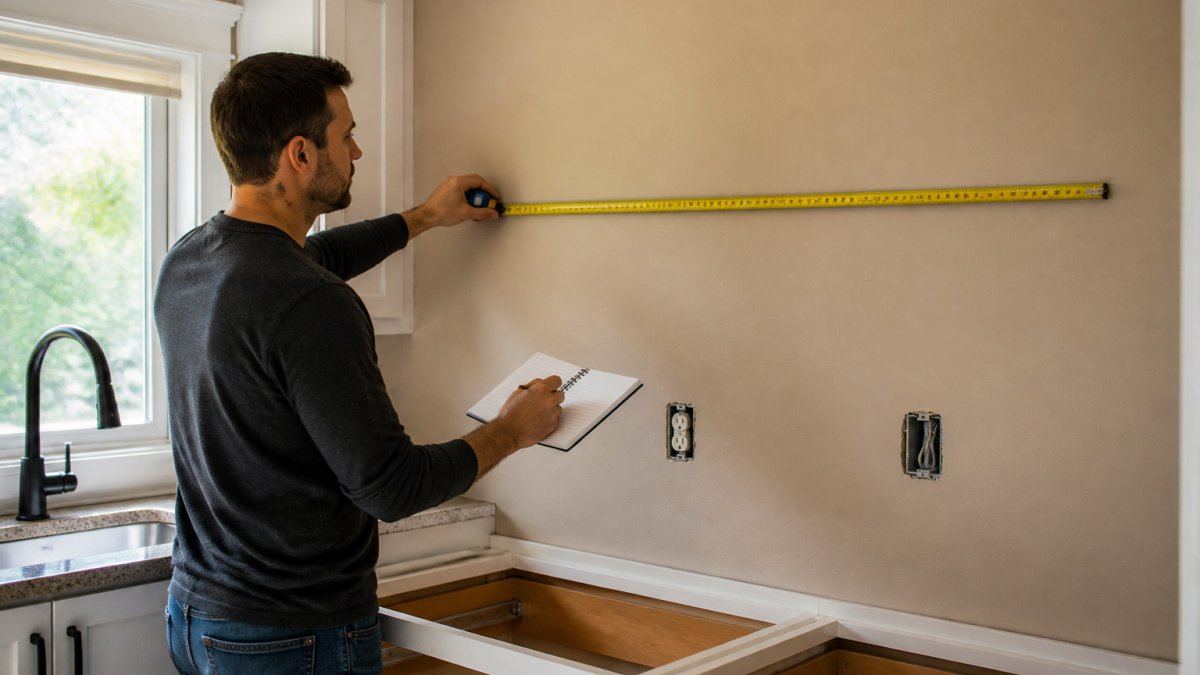
Measuring Your Kitchen for Proper Fit
Accurate measurements are the foundation of any kitchen and cabinet project; one mistake cascades into installation problems.
Measure wall length corner to corner with a steel tape at three heights (bottom, middle, top), since walls aren't always straight.
Measure floor to ceiling at multiple points, note obstacles like outlets, windows, or pipes, and mark the sink, stove, and refrigerator locations.
Document every measurement on a scale drawing (graph paper or free online tools), marking door swings, windows, and appliances. This sketch becomes your ordering and installation reference.
Common measurement mistakes to avoid:
- Measuring only at one height on uneven walls
- Forgetting to account for baseboards and trim
- Measuring from the wrong starting point
- Not noting obstacle locations
- Rounding measurements (be precise to the quarter inch)
Common Kitchen Layouts and Cabinet Placement
The galley layout places cabinets on two opposite walls, efficient for small kitchens and single-cook households with one-directional traffic.
The L-shaped layout places cabinets on two adjacent walls, creating a natural work triangle. It suits medium kitchens and two cooks.
The U-shaped layout surrounds three walls, maximizing storage and creating an efficient work zone, though counter space is limited in small kitchens.
The island layout adds a freestanding cabinet unit in the center, providing extra storage, counter space, and seating.
Kitchen Cabinet Organization Ideas for Maximum Storage
Smart organization transforms your kitchen and cabinet space into a functional system where everything is visible and accessible.
Use drawer dividers for utensils and tools, assign zones for baking supplies, spices, and everyday dishes, and group similar items together.
Pull-out shelves and rollout trays maximize deep cabinet space by sliding everything forward, doubling usable space in base cabinets.
Vertical dividers organize baking sheets, cutting boards, and serving platters, preventing stacking and making items easy to grab.
Label everything, especially pantry items.
The Dover Tall Pantry Cabinet with Rollouts includes four rollout shelves that make organization effortless, a design principle that applies to any kitchen and cabinet system.

Ready-to-Assemble Kitchen Cabinets: Benefits and Assembly
Ready-to-assemble cabinets, or RTA cabinets, arrive flat-packed and unassembled, offering significant advantages for budget-conscious homeowners.
Why RTA Cabinets Save Time and Money
RTA kitchen and cabinet systems offer significant cost savings thanks to simplified manufacturing and direct-to-consumer sales, so your money goes toward actual cabinet quality.
Assembly is straightforward: most people assemble a single cabinet in 30-45 minutes, and a full kitchen takes 8-16 hours spread across several days.
RTA cabinets ship quickly because they're made in standard sizes, while custom cabinets require 6-12 weeks.
Quality RTA cabinets use solid wood frames and plywood construction, just like expensive alternatives. The difference is manufacturing efficiency, not material quality.
Dover - Sink Base Cabinet W/1 Tilt Outs & Butt Doors →
Step-by-Step Assembly Process
Unpack and organize all parts by cabinet type, checking everything matches your order before starting.
Follow these assembly steps:
- Assemble the cabinet box first by connecting sides, top, and bottom with dowels or cam locks
- Attach the back panel, which squares and strengthens the entire structure
- Install shelf supports and any interior components
- Attach the face frame, which provides mounting points for doors and drawers
- Install hinges on doors and attach doors to the face frame
- Install drawer slides and assemble drawers
- Attach hardware like handles and knobs
- Test all doors and drawers for smooth operation
Each step requires basic tools: a power drill, level, and screwdriver. Most mistakes happen when people skip steps or rush, so double-check alignment.
Common assembly errors include:
- Attaching the back panel crooked, throwing off the entire cabinet
- Installing hinges at the wrong height
- Over-tightening cam locks, which cracks wood
- Forgetting to install drawer stops
- Not checking for square before final assembly
Cabinet Materials, Finishes, and Durability
Kitchen and cabinet materials determine longevity and appearance, so understanding options helps you match your budget and lifestyle.
Laminate finishes resist moisture and staining better than wood, are easier to clean, and cost less, though they show wear differently.
Thermofoil finishes are vinyl wrapped around MDF cores, resist moisture well, and cost less than solid wood but can peel if damaged.
White oak and Shaker styles remain popular because they suit most designs.
Budgeting Your Kitchen and Cabinet Project
Kitchen and cabinet costs vary dramatically, so understanding the breakdown helps you allocate your budget wisely.
Cost Breakdown by Cabinet Type and Material
Base cabinets cost more per unit than wall cabinets because they're larger and support more weight. A standard 36-inch base cabinet varies in cost depending on materials and features.
Wall cabinets cost less because they're shallower and lighter.
Specialty cabinets command premium prices.
Material choice significantly impacts price:
- Laminate finishes: least expensive, most durable
- Painted finishes: moderate cost, good durability
- Natural wood stains: higher cost, requires maintenance
- Thermofoil finishes: moderate cost, moisture resistant
At Frugal Cabinets Online, we offer premium kitchen and cabinet quality at RTA pricing. The Dover Base Cabinet with Soft-Close Rollouts starts at $722, delivering professional features at a fraction of custom costs.

Hardware costs add up quickly. Hinges, handles, and drawer slides range from budget-friendly to designer quality. Quality hardware ensures smooth operation for years.
DIY vs. Professional Installation Costs
DIY assembly saves labor but requires time and basic skills: $0 if you do it yourself, or $50-100 per cabinet if you hire help.
Professional installation adds $100-200 per cabinet and ensures perfect alignment, handling complications like uneven walls.
Professional installation makes sense if:
- Your walls are severely uneven
- You have time constraints
- You lack basic carpentry skills
- Your kitchen has complex layouts
DIY installation makes sense if:
- You have basic tool skills
- You have flexible timeline
- Your walls are reasonably straight
- You want maximum cost savings
A typical 20-cabinet kitchen involves significant investment for cabinets alone. DIY assembly can offer savings, while professional installation adds to the overall cost.
Installation: DIY or Professional Help
Kitchen and cabinet installation determines project success: proper installation prevents sagging doors, sticking drawers, and shifting cabinets.
Preparing Your Kitchen for Installation
Remove everything from old cabinets before installation, starting days ahead and sorting items as you pack: keep, donate, recycle.
Remove old cabinets carefully with a pry bar, working slowly to avoid wall damage, then fill nail holes with spackling compound.
Check walls for plumb and level with a 4-foot level at multiple points, mark high spots, and shim as needed so cabinets sit perfectly level.
Locate and mark wall studs with a stud finder. Cabinets must be screwed into studs, not just drywall, to prevent sagging under weight.
Common Installation Mistakes to Avoid
Not finding studs means cabinets hang only from drywall, sagging under weight and eventually pulling away.
Installing cabinets too high wastes wall space and makes uppers hard to reach.
Installing without a helper makes the job harder and riskier. Wall cabinets are heavy and awkward.
Skipping the template step leads to incorrect measurements.
Not checking for square before securing cabinets compounds problems; verify diagonal measurements before final fastening.
| Cabinet Type | Best For | Typical Cost Range | Assembly Time |
|---|---|---|---|
| Base Cabinet | Countertop support and lower storage | $600-1,200 | 30-45 minutes |
| Wall Cabinet | Upper storage and display | $300-700 | 20-30 minutes |
| Tall Pantry | Bulk storage and small appliances | $1,200-2,000 | 45-60 minutes |
| Specialty (Trash, Spice) | Specific storage problems | $300-500 | 20-40 minutes |
Kitchen Cabinet Planning Guide from the National Kitchen and Bath Association
Home Improvement Standards and Best Practices
DIY Cabinet Installation Safety Guidelines
Frequently Asked Questions
Are ready-to-assemble kitchen cabinets a good option for a budget renovation?
Ready-to-assemble kitchen cabinets offer excellent value for budget-conscious homeowners. They combine quality craftsmanship with significant cost savings compared to custom or semi-custom options. RTA cabinets ship flat, reducing transportation costs, and arrive with all hardware included. Most homeowners find assembly manageable with basic tools, though professional installation is available if needed. The Dover base cabinet with soft-close rollouts, for example, provides durable construction with convenient storage features at a fraction of premium cabinetry prices.
How do I choose kitchen cabinets for my kitchen layout?
Start by measuring your kitchen space precisely, including height, width, and depth of available areas. Identify your cabinet needs: storage for dishes, pots, pantry items, or specialty functions like trash pullouts. Consider your kitchen workflow and which items you use most frequently. Match cabinet types to your layout, base cabinets for lower areas, wall cabinets for upper storage, and tall cabinets like pantries for vertical space. Sketch your layout or use design tools to visualize placement before ordering.
What is the cheapest way to get quality kitchen cabinets?
Ready-to-assemble cabinets from factory-direct retailers offer the lowest prices without sacrificing quality. You save on labor and overhead costs compared to custom shops. Look for promotions like flat 50% off premium cabinets or free shipping on larger orders. Choosing standard finishes like white or natural wood tones costs less than specialty colors. Handling assembly yourself instead of hiring installers also reduces expenses. Purchasing during sales periods or bundling multiple cabinet types can further reduce your total project cost.
How can I add more storage to my kitchen cabinets?
Maximize existing cabinet space with pull-out organizers, drawer dividers, and tiered shelving. Install soft-close rollout trays to access items at the back of deep cabinets. Use vertical space by adding shelves or stacking items efficiently. Consider specialty cabinets like tall pantries with rollouts for dry goods storage. Incorporate drawer fronts with multiple compartments for utensils and small items. A trash pullout cabinet keeps waste out of sight while freeing counter space. Combining different cabinet types strategically ensures every inch serves your storage needs.

