


RTA Cabinet Assembly Time and Difficulty: A Realistic Guide

Table of Contents
- How Difficult Is RTA Cabinet Assembly for Beginners
- Tools Needed to Assemble RTA Cabinets
- How to Assemble RTA Cabinets: Step-by-Step Process
- RTA Cabinet Assembly Time: What to Expect
- Common RTA Cabinet Assembly Mistakes to Avoid
- Assembly Versus Installation: What's the Difference
- Frequently Asked Questions
Last Updated: October 14, 2026
How Difficult Is RTA Cabinet Assembly for Beginners
RTA cabinet assembly is manageable for most homeowners, but difficulty depends on your experience level and cabinet type. Base cabinets take 30 to 60 minutes for beginners; wall cabinets run 15 to 30 minutes.
At Frugal Cabinets Online, we've watched thousands of homeowners tackle RTA cabinet assembly. Those who succeed prepare thoroughly: laying out parts, verifying hardware counts, and understanding the assembly sequence.
Ready-to-assemble cabinets come with pre-drilled holes and dowels that guide alignment, no cutting joints or measuring complex angles.
The honest assessment: RTA cabinet assembly is easier than building from scratch, but harder than some guides suggest. Budget extra time for your first cabinet. You'll move faster on the second and third.
Tools Needed to Assemble RTA Cabinets
Essential Tools and Workspace Setup
You don't need a full workshop to assemble RTA cabinets, but you do need the right tools staged before opening the first box.
Core hand and power tools:
- Cordless drill/driver with a clutch (set it low so you don't strip screw holes in particleboard or plywood)
- #2 Phillips driver bits (buy spares; cam-lock and hinge screws eat bits)
- Adjustable wrench or socket set sized to your cabinet's cam bolts
- Hex key set (metric and SAE, since imported hardware often uses metric)
- 24-inch level (a 48-inch level is better for checking a row of joined boxes)
- Tape measure with a locking blade
- Rubber mallet (for seating dowels without marring the finish)
- Speed square or framing square (for corner checks)
- Utility knife (for trimming packaging and opening hardware bags)
Optional but genuinely helpful:
- Bar or spring clamps (hold a panel steady while driving the first screw)
- Impact driver (faster for long runs, but easy to over-torque, use the low setting)
- Stud finder and laser level (installation tools, not assembly tools)
- Shims (for leveling during installation, not squaring a box on a bench)
- Small vacuum or compressed air (clearing sawdust from dowel holes)
Protective equipment:
- Safety glasses (chips fly when drilling overhead)
- Nitrile gloves (finishes and edge banding leave residue)
- Dust mask if sanding or cutting filler strips
- Knee pads if assembling on a garage floor
Workspace setup: Clear a flat, level surface at least 4 feet by 4 feet, a garage floor, basement slab, or large worktable. Two sawhorses with a sheet of plywood make a good improvised bench.
Hardware organization: Dump each cabinet's hardware into its own container, a muffin tin, small bins, or labeled zip bags, and keep the parts list with it. This prevents the mid-assembly search for a single cam lock that stalls the whole job.
How Tool Needs Change With Cabinet Construction
Not every RTA cabinet assembles the same way; the hardware in the box tells you which tools matter most.
- Cam-lock (cam and bolt) systems: The bolt threads into a pre-installed fitting and the cam disc locks it from the inside panel. You need a screwdriver for the cam and often a wrench or hex key for the bolt. Cam locks forgive minor misalignment but not over-tightening, the cam can crack if you force it.
- Dowel-and-screw construction: Dowels align panels, screws hold them. You need the mallet for dowel seating and the drill for screws. A dowel driven at an angle throws off the whole box.
- Clip or connector systems: Some frameless cabinets use plastic or metal clips instead of cam locks. They snap or slide into place with little more than a screwdriver, but are less adjustable once seated.
- Frameless vs. framed: Frameless (full-access) boxes have no face frame, so the panels define square, a speed square and level matter more. Framed cabinets have a face frame that can mask small panel misalignment, but the frame itself must be square before doors hang correctly.
- Material differences: Plywood boxes hold screws better and resist stripping; particleboard and MDF are more prone to blowout, so a clutch setting and pilot holes matter more. Solid wood face frames and doors are heavier and benefit from clamps.
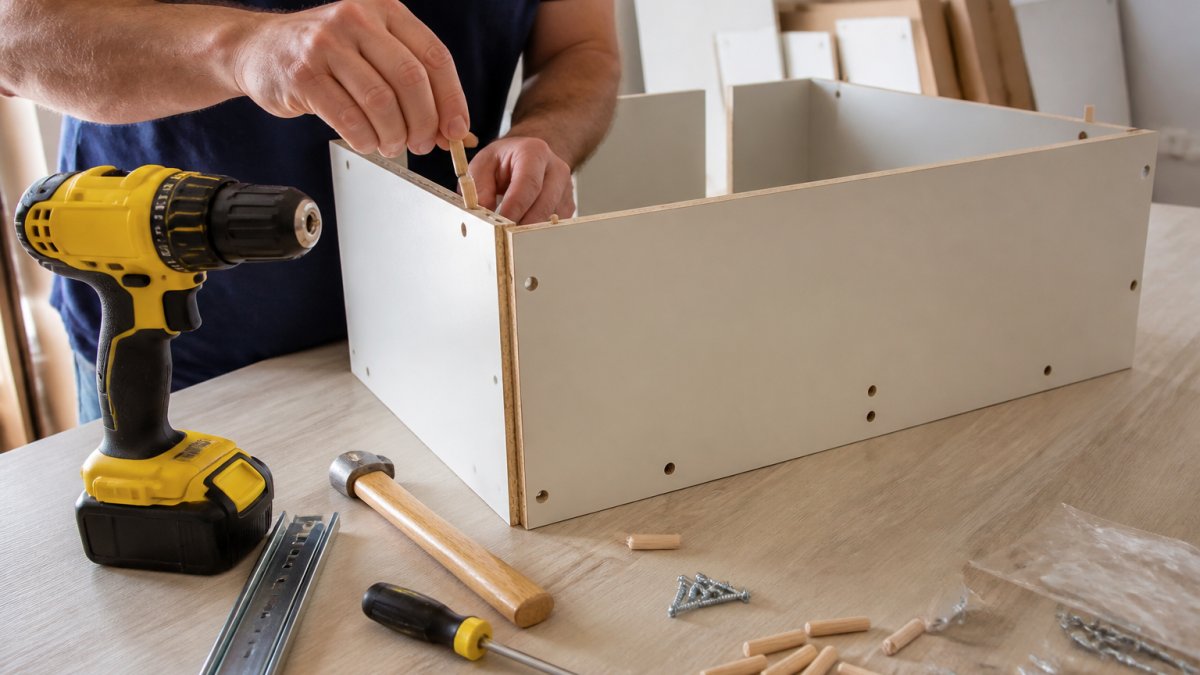
How to Assemble RTA Cabinets: Step-by-Step Process
Preparing Parts and Hardware Before Starting
Before you pick up a single tool, lay out every piece. Check your parts list against what arrived. Missing dowels or hardware will stop you mid-assembly.
Inspect panels for damage. Small dings happen during shipping; deep gouges or cracks mean the panel won't sit flush.
Organize hardware by cabinet section. When assembling multiple cabinets this is critical, one mislabeled screw means forcing the wrong fastener into a hole it doesn't fit.
Check dowel holes for debris. Sawdust or plastic shavings prevent dowels from seating fully; clear them with a small brush or compressed air. A dowel that doesn't seat completely throws off your box alignment.
Building and Squaring the Cabinet Box
Start with the cabinet sides and bottom panel. Insert dowels into the side panels first, then position the bottom panel.
Drive screws through the bottom panel into the side panels with a cordless drill at medium speed.
Now comes the critical step: square your box. Set it on a flat surface. Place your level on the bottom panel.
Use your speed square to check the corners, they should be 90 degrees. If a corner is off, you likely have a dowel misalignment.
Once the box is square, install the back panel if your cabinet includes one. This locks everything in place and prevents racking (twisting).
Attaching Doors, Drawers, and Hardware
Doors and drawers attach after the box is complete. Most RTA cabinets use adjustable hinges. This is where precision pays off.
Install hinges on the door first, then hang it on the cabinet. Most hinges have three adjustment screws, height, side-to-side, and depth.
Drawers use similar logic: slides attach to the cabinet sides and must be positioned carefully.
Install soft-close hardware if your cabinets include it. Soft-close rollout trays, like those available from Frugal Cabinets Online, require precise installation, the damper mechanism needs clearance to function.

Adjust doors and drawers after installation. Hinges allow for micro-adjustments. Spend time getting alignment right. A well-adjusted door is the first thing people notice.
RTA Cabinet Assembly Time: What to Expect
Time Per Cabinet by Type and Experience Level
Base cabinets (30 to 60 minutes): Beginners 60, intermediate 40, experienced 25.
Wall cabinets (15 to 30 minutes): Beginners 30, intermediate 20, experienced 12. Wall cabinets are smaller and lighter, so assembly is faster.
Tall pantry cabinets (45 to 90 minutes): Beginners 90, intermediate 60, experienced 40. Tall cabinets are top-heavy and harder to keep square.
Drawer banks and cabinets with rollout trays: Add 15 to 30 minutes per drawer or rollout.
Experience matters most on the second and third cabinet. You learn the sequence, anticipate where dowels go, and stop repeating mistakes.
Realistic Timeline for a Full Kitchen
A typical kitchen has 12 to 15 cabinet boxes, mixing base, wall, and tall units. Here's how the per-cabinet numbers scale once you account for the work that isn't assembly.
What the per-cabinet estimates leave out:
- Unpacking and flattening cardboard: 5 to 10 minutes per cabinet
- Parts and hardware check against the inventory sheet: 5 minutes per cabinet
- Breaks and fatigue: add 10 to 15 percent to any multi-hour estimate
- Adjustments and rework: add 15 to 20 percent, more for beginners
Two people working together: One assembles while the other organizes hardware and checks square. Realistic total: 7 to 9 hours, two sets of hands make squaring and alignment noticeably easier.
Realistic timeline by experience level (assembly only, including unpacking and adjustments):
| Experience | 12 Cabinets | 15 Cabinets |
|---|---|---|
| Beginner | 14-17 hours | 18-22 hours |
| Intermediate | 10-12 hours | 12-15 hours |
| Experienced | 7-9 hours | 9-11 hours |
Most homeowners spread assembly across 2 to 3 evenings. One evening per 4 to 5 cabinets keeps you fresh and reduces mistakes. Rushing creates problems that surface during installation, when fixing them is harder.
Assembly Time Versus Installation Time
This is where most time estimates mislead. Assembly happens on a bench or floor.
Wall cabinet installation: Locate wall studs, establish a level line across the wall, then hang, level, and secure to studs. Time: 30 to 45 minutes per cabinet.
The gap between the two: Assembly runs 30 to 60 minutes per cabinet. Installation adds another 25 to 45 minutes.
Professional installers do both faster because they've seen the same layouts and own the right tools. For most homeowners, assembly is doable.
Common RTA Cabinet Assembly Mistakes to Avoid
Skipping the parts check. You find a missing dowel halfway through cabinet three and you're stuck.
Over-tightening screws. A screw driven too hard strips the hole or splits the panel.
Skipping the square check. A box that's not square looks fine until you install doors, then everything binds.
Assembling on an uneven surface. Your garage floor might look flat but isn't. Assemble on a level surface.
Not organizing hardware. Mixing screws, dowels, and cam locks creates chaos. Label containers. Know exactly where each fastener goes.
Installing doors before the box is square. Doors hide misalignment temporarily, then bind and won't close.
Assembly Versus Installation: What's the Difference
Assembly is building the cabinet box, attaching doors and drawers, and preparing it for placement. It happens on your workbench or floor.
Installation is hanging or securing the cabinet in your kitchen, where assembly time estimates often mislead homeowners.
Base cabinet installation:
- Secure the cabinet to the floor and wall studs
- Shim underneath to level the cabinet
- Ensure the front edge is perfectly level
- Attach adjacent cabinets together
- Time: 20 to 30 minutes per cabinet
Wall cabinet installation:
- Find wall studs with a stud finder
- Hang the cabinet and level it
- Secure to studs with appropriate fasteners
- Time: 30 to 45 minutes per cabinet
The gap between assembly and installation: Assembly takes 30 to 60 minutes per cabinet; installation adds another 25 to 45 minutes.
Professional installers do both faster, with experience across cabinet styles and kitchen layouts and specialized tools like stud finders and laser levels.
RTA cabinet assembly is within reach for any homeowner willing to prepare and take their time. The difficulty comes not from complexity but from precision.
If you're sourcing cabinets for your kitchen, Frugal Cabinets Online offers premium ready-to-assemble options with solid wood frames and sturdy plywood construction. Start with a fully refundable sample door, then Plan Your Project with confidence.
Frequently Asked Questions
How long does it take to assemble one RTA cabinet?
Most homeowners assemble a single base or wall cabinet in 30 to 60 minutes. Beginners may need 45 minutes to 90 minutes, while experienced DIYers can finish in 20 to 30 minutes. Time depends on cabinet complexity, the number of drawers and doors, and your familiarity with the assembly process. Wall cabinets typically take slightly less time than base cabinets because they have fewer components.
What are the most common RTA cabinet assembly mistakes?
The most frequent errors include skipping the parts inventory step, which leads to missing hardware halfway through; failing to square the cabinet box before attaching the back panel, causing doors to hang unevenly; over-tightening screws and dowels, which can crack wood; and misaligning drawer guides, resulting in sticking drawers. Taking 10 minutes upfront to verify all parts and using a level to square the box prevents most of these problems.
Can one person assemble RTA cabinets alone?
Yes, one person can assemble RTA cabinets alone, though having a second person makes the work faster and easier, especially when squaring and securing the cabinet box. A single person should use temporary supports or clamps to hold pieces in place while fastening. Base cabinets are heavier and more awkward solo, so a helper becomes more valuable for those. Wall cabinets are manageable for most people working independently.
What tools do I absolutely need to assemble RTA cabinets?
Essential tools include a power drill with a screwdriver bit, a level (24 inches or longer), a measuring tape, a square, and a rubber mallet for tapping dowels and cam locks into place. You'll also need a Phillips head screwdriver for backup and shims to level cabinets during installation. Most homeowners already own the basic tools; a complete toolkit costs $50 to $150 if starting from scratch.

