


How to Measure for Custom Vanity Sink Bases

Last Updated: November 5, 2026
Quick Summary
To measure for a custom vanity sink base, record the wall-to-wall width at the top, middle, and bottom, the depth from the finished back wall, and the height from the finished floor, then use the smallest reading in each set. Also map the drain center, supply lines, and shutoff valves so the plumbing clears the cabinet interior.
- Measure to the finished wall, not the studs, since drywall, tile, and backer board eat into your space.
- Keep cabinet-base, countertop, and sink dimensions on separate labeled lines because they are not the same numbers.
- If width readings differ by more than about 1/4 inch, plan for a filler strip or scribe panel.
- Subtract your planned countertop thickness from the finished height to get the cabinet height you order.
- Ordering a drawer-heavy base over a floor-mounted drain can leave no room for the P-trap.
Table of Contents
- Why Vanity Sink Base Measurements Decide Your Whole Bathroom Fit
- Bathroom Vanity Measurements: What to Record Before You Shop
- How to Measure a Bathroom Vanity in Six Steps
- Bathroom Vanity Width and Depth: Matching the Base to Your Layout
- Vanity Sink Plumbing Clearance: Drain, Supply Lines, and Rough-In
- Out-of-Square Walls, Finished-Wall Conditions, and Measurement Tolerances
- Sink Count, Sink Spacing, and Clearance for Doors and Walkways
- Choosing Your Vanity Sink Base and Planning Your Project
- Frequently Asked Questions
Why Vanity Sink Base Measurements Decide Your Whole Bathroom Fit
A vanity sink base is the cabinet that holds the sink and hides the plumbing.
This guide from Frugal Cabinets Online walks you through measuring for custom vanity sink bases, step by step.
The core problem most guides skip: your cabinet size and your countertop size are two different numbers. Mix them up and you order the wrong base.
We'll cover what to record before you shop, a six-step measuring workflow, crooked walls and plumbing, and sizing for one sink or two.
Bathroom Vanity Measurements: What to Record Before You Shop
Start with a simple list, with a sketch of the room.
Record these bathroom vanity measurements:
- Wall-to-wall width at the back, middle, and front
- Depth from the finished back wall to the front edge
- Finished floor to finished wall height
Measure to the finished wall, not the studs. Drywall, tile, and backer board all eat into your space.
Separating Cabinet-Base Dimensions From Countertop and Sink Dimensions
This is where most orders go wrong. Three sets of numbers exist, and they are not the same.
- Cabinet-base dimensions: the box itself. Width, depth, and height of the cabinet only.
- Countertop dimensions: usually wider and deeper than the base, with an overhang.
- Sink dimensions: the bowl size plus the cutout size, which differ.
A 24-inch base does not mean a 24-inch countertop. The top overhangs the base, and the sink cutout sits inside the top.
Write each set on a separate line. If you want to see how a full-height door base is built, browse our full height door vanity base so you can picture the cabinet box apart from the top.
Standard Dimensions and Size Ranges to Compare Against
Standard sizes give you a starting point, not a final answer.
How to Measure a Bathroom Vanity in Six Steps
Here is the workflow we recommend for anyone learning how to measure a bathroom vanity for a custom order. Do it in this order, and write every number on a single worksheet.
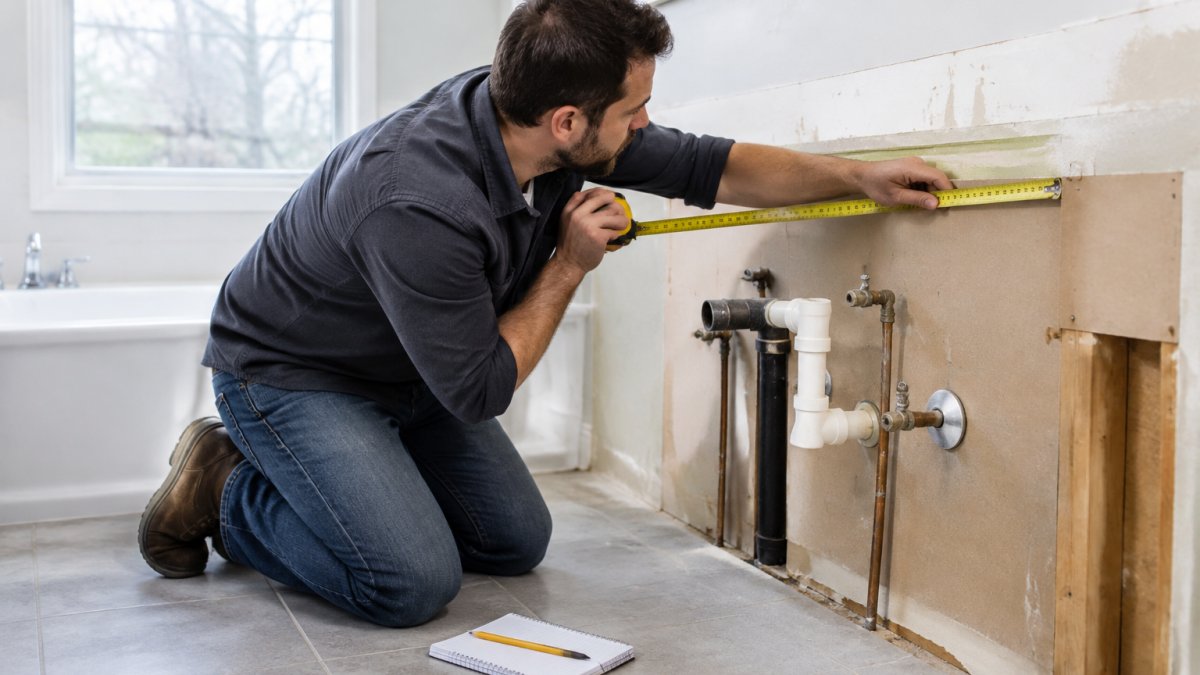
Set up your worksheet with six labeled blocks before you pick up the tape: Width, Depth, Height, Plumbing, Obstructions, and Photos. Every reading gets a location note (for example, "width at back wall, top").
- Clear the space. Remove the old vanity, mirror, and any shelf that blocks the wall. Expose the full finished wall behind the cabinet and the finished floor beneath it.
- Check the floor and wall. Note any slope, bow, or out-of-square corner. Use a 4-foot level on the floor and a square in each corner, and write down what you find rather than trying to correct it later.
- Measure width at three points: top, middle, and bottom of the back wall. Record all three numbers, then circle the smallest, that is your true available width.
- Measure depth from the finished back wall to where the front edge of the cabinet should land. Take this reading at the left, center, and right of the wall, and record the smallest.
- Measure height from the finished floor to the finished wall at the left, center, and right. Record the smallest, then subtract your planned countertop thickness to get the cabinet height you will order.
- Map the plumbing: drain center, supply lines, and shutoff valves. Measure each from the finished back wall and from the nearest side wall, and note the height above the finished floor.
Recording Width, Depth, and Height on a Worksheet
A worksheet only works if every number has a home. Use these columns:
- Width: back wall top, middle, bottom; left side wall top, middle, bottom; right side wall top, middle, bottom. Circle the smallest of each set.
- Depth: left, center, right, measured from the finished back wall to the intended front edge.
- Height: left, center, right, measured from the finished floor to the finished wall.
Design to the smallest reading in each column, because a cabinet that fits the tightest point will fit everywhere else. If the spread between your largest and smallest width reading is more than about 1/4 inch, plan for a filler strip or a scribe panel rather than ordering to the average.
Measuring Width at Multiple Points
Never trust a single width reading. Walls bow. Corners are rarely square.
Take the wall-to-wall measurement at the top, middle, and bottom, and use the smallest number, that's your true available width.
If the three readings differ by more than a small amount, your wall is out of square. Plan for a filler strip or a custom panel to close the gap.
Measuring Depth, Height, and Floor Level
Depth decides how much floor you keep. Measure from the finished back wall to the front edge you want.
For height, measure from the finished floor up. Check the floor level in a few spots too. A sloped floor changes how the cabinet sits and where the top lands.
Decide your finished height first, then subtract the countertop thickness to get your cabinet height.
The Photo Checklist to Send With Your Order
Numbers alone can miss what a photo catches. Before you order, take and label these shots:
- The full wall behind the vanity, straight on, with a tape measure visible across the width.
- Each corner where the vanity will sit, close enough to show any gap or bow.
- The plumbing stub-out, with a tape measure showing drain center height and distance from each side wall.
A common pattern is that a photo reveals a baseboard, tile edge, or outlet that the tape measure never mentioned. Label each photo with the same block name you used on the worksheet.
Follow these six steps in order and record every reading on a single worksheet.
| Step | What to do | What to record |
|---|---|---|
| 1 | Clear the space | Expose full finished wall and floor |
| 2 | Check floor and wall | Slope, bow, out-of-square corners |
| 3 | Measure width at three points | Top, middle, bottom; circle smallest |
| 4 | Measure depth | Left, center, right; record smallest |
| 5 | Measure height | Left, center, right; subtract countertop thickness |
| 6 | Map the plumbing | Drain center, supply lines, shutoff valves |
Bathroom Vanity Width and Depth: Matching the Base to Your Layout
Bathroom vanity width and depth should follow the room, not the other way around. A base that fits the wall but blocks the door is still the wrong base.
US Shaker - Vanity Sink Base Full Height Butt Doors →
Match the base to your layout:
- Powder room: a narrow single base keeps the walkway open
- Small bathroom: shallow depth buys back floor space
- Primary bath: a wider double base fits two users
If you're comparing base styles to your space, a hanging vanity sink base with two doors can suit a layout where you want floor visible beneath the cabinet.
Vanity Sink Plumbing Clearance: Drain, Supply Lines, and Rough-In
Vanity sink plumbing clearance is the number most people forget. The cabinet has to fit around the pipes, not through them, for a custom sink base, the plumbing map decides which interior layout you can order.
Record these on your worksheet before you order:
- Drain center from the back wall and from each side wall
- Drain height above the finished floor
- Supply line height and spacing, left and right
The rough-in is where the drain and supplies come out of the wall or floor. A sink base has an open back for this reason, but a drawer stack can still collide with a valve or a trap arm.
How Drain and Supply Locations Constrain the Cabinet Interior
A sink base is not empty space. The back is open for plumbing, but the interior still has a floor, side panels, and often a false drawer front at the top.
Use these rules when you map the plumbing:
- Wall-mounted drain: the trap arm comes out of the wall and drops into the cabinet. Measure the drain center height and note how far the trap arm projects into the cabinet, usually several inches. A full-height door base leaves the most room; a drawer stack directly under the sink can block the trap.
- Floor-mounted drain: the pipe comes up through the cabinet floor. Note the exact center from each side wall, because the cabinet floor will need a cutout and the trap will rise inside the cabinet. A drawer bank over a floor drain often leaves no room for the P-trap.
- Supply lines and shutoffs: measure their height and spacing, and note how far the valves stick out from the wall. A shallow cabinet or a drawer box can hit a shutoff that projects more than a couple of inches.
A common pattern is that the sink center and the drain center do not line up. If the drain is offset, the trap will sit at an angle inside the cabinet, workable in a door base but often a problem in a drawer base.
Checking the Interior Layout Against the Plumbing Map
Before you order, sketch the cabinet interior on your worksheet and mark the plumbing zone on it. Then check:
- Does the P-trap fit inside the cabinet without hitting a drawer box or a shelf?
- Do the shutoff valves clear the side panels and the drawer slides?
- If the drain is floor-mounted, is there room for the trap to rise without blocking a drawer?
Watch out: ordering a drawer-heavy base over a floor-mounted drain can leave no room for the P-trap, and the error usually shows up only at installation, when the cabinet is already built. If your plumbing map shows a conflict, choose a door base or a base with a reduced drawer stack under the sink.
Measurement Tolerances for Plumbing Clearance
Leave a little room around every pipe. If your readings show less, flag it for the fabricator rather than ordering to the exact dimension.
Finished-wall conditions matter here too. Tile, backer board, and baseboard all push the finished wall out from the studs, moving the drain and supply centers relative to the finished surface. Measure from the finished wall, not the studs, and note the wall thickness on your worksheet.
Out-of-Square Walls, Finished-Wall Conditions, and Measurement Tolerances
Old bathrooms are rarely square. Plan for it instead of fighting it.
Handle irregular walls with these steps:
- Measure width at three heights and use the smallest
- Check corners with a square or a 3-4-5 triangle
- Note where the wall bows inward
Leave a small installation gap and cover it with filler strips or a finished panel. When you're dealing with uneven finished-wall conditions, a custom sized finished panel can close the gap cleanly.

Sink Count, Sink Spacing, and Clearance for Doors and Walkways
Sink count drives width. One sink needs less room than two, and spacing between bowls matters as much as the total.
Use these rules of thumb:
- Keep space between two sinks so elbows don't collide
- Leave room for door swing and drawer clearance
- Keep a clear walkway clearance in front of the base
For a multi-door, multi-drawer layout, a recessed vanity base with two doors and four drawers shows how sink count and clearance work together.

Choosing Your Vanity Sink Base and Planning Your Project
Once your numbers are recorded, choosing gets simple. Match width, depth, and height to your smallest readings. Then confirm the plumbing clears the cabinet's inside.
Our ready-to-assemble vanity sink bases come in Shaker styles at clear prices, with free design help if you're unsure. Once you've measured, you can browse a two-door, six-drawer vanity sink base to see how a real base matches your numbers.

Get started with Frugal Cabinets Online and order a sink base that fits the first time.
Frequently Asked Questions
How do you measure for a custom vanity sink base?
Measure the wall-to-wall width at three points: near the floor, at counter height, and near the ceiling. Record the smallest number, because the base must fit the tightest spot. Then measure depth from the finished wall to the front edge you want, and height from the highest floor point to the underside of the countertop. Write down the drain and supply-line locations inside the cabinet opening, and photograph the wall with your tape measure visible in each shot.
What is the difference between cabinet width and overall vanity width?
Cabinet width is the box itself. Overall width includes the countertop overhang, which typically adds about 1 inch on each side. If you order a 36-inch vanity sink base, plan for a countertop closer to 37 or 38 inches depending on the overhang you want. Order the cabinet to fit the wall opening, then size the top to the cabinet, not the other way around. This is the most common ordering mistake.
How much clearance does a vanity sink need around the plumbing?
Inside the cabinet, the drain and supply lines need room to run without hitting the back of the box or the drawer mechanism. Measure the height of the drain stub-out from the floor and its distance from each side wall, then compare those numbers to the interior depth of the sink base you are considering. The US Shaker Vanity Sink Base Full Height Butt Doors is priced at $1,061.00.
How do you handle a wall that is not square?
Measure the width at the top, middle, and bottom of the wall. If the numbers differ by more than a quarter inch, order to the smallest measurement and plan for filler strips to close the gaps at the ends. Check the corner with a framing square or a 3-4-5 triangle. Out-of-square corners are normal in older bathrooms, and fillers are the standard fix, not a custom-cut cabinet.
Measuring for a custom vanity sink base comes down to recording the right numbers before you shop. At Frugal Cabinets Online, we offer premium ready-to-assemble cabinets with flat 50% off, free shipping on orders over $2,500, and free design services to help you get the fit right. Plan your project with us and measure once, order once.


